Create and Manage Sections within your Course
Sections help subdivide students within a course and offer section-specific options such as varied due dates for assignments, discussions, and quizzes. Sections also display for each student within the course People page and the Gradebook.
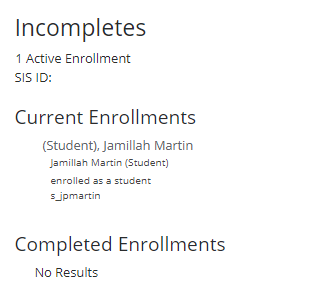
Sections can also be created for students who need extra time in a course, such as if a student has an incomplete grade.
You can add a section to your course by editing your course Settings in Canvas.
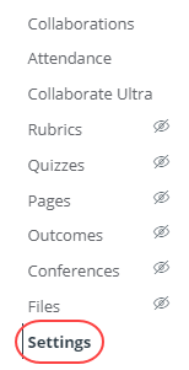
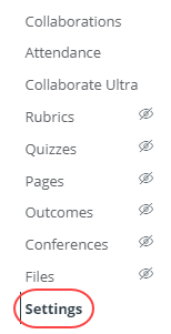
1. In Course Navigation, click the Settings link.
2. Click the Sections tab.

3. In the section field, type the name of the new section. Click the + Section button.

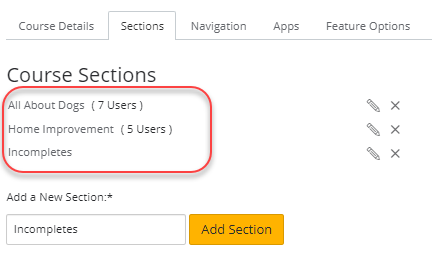
View the section in your course.
You can also choose to change section start and end dates if needed.
You can add additional sections if necessary. Multiple sections are ordered alphabetically.
Note: If a section was previously added via SIS, and you have permission to view SIS IDs, the section's SIS ID also displays in the Course Sections page.
Add Users to a Section
Once you have added sections to your course, you can add users to sections from the People page in your course.
By default, sections inherit course dates set for your entire institution. If a course does not include specific dates, the section dates default to term dates. However, as an instructor, you may need to change the start and end dates for a course section. Dates can be shorter than or overlap the course or term dates.
Adding section dates may also affect the Courses page and the placement of the section's course in the Past, Current, or Future Enrollments list for students. For more information, view the interactive Student Course Visibility and Participation flowchart.
Limit User Participation Dates
You can set whether or not students can only participate in the section during the specified section dates using the Student Participation checkbox. Participation means that students can submit assignments, post discussions, upload files, or take part in any other action-based task for the course section. If you limit students to only be able to participate during the section dates, they can accept the course section invitation, access the course section, and look at content, but they cannot fully participate until the first day of the course for the section. When the course section is concluded, the course section is placed in a read-only state.
Section Override Dates
Section override dates are only created if the Student Participation checkbox is selected as part of creating section start and end dates (both dates are required). Students can participate in the course section before and after the start and end date, and participation will always be determined by the course dates. If a course does not include override dates, dates are determined by term dates.
Dashboard Considerations
The Student Participation sections checkbox may also affect courses that have been marked as a favorite and display in the Dashboard. If a section includes an override date and the Student Participation checkbox is selected, students cannot participate in the course after the section end date, and the course will be removed from the Dashboard.
Moreover, if the Student Participation checkbox is not selected, the course will still display in the Dashboard as a favorite course after the section end date since the course section still allows participation as an active course. The course will not be removed until the course section is concluded via course/term dates. However, if the Student Participation checkbox is not selected for the section, the section dates determine the placement of the course section in the Past, Current, or Future Enrollments list regardless of the course/term dates.
Note: You can only change section end dates when your enrollment is active. Section dates cannot be changed once your enrollment has concluded for the course.
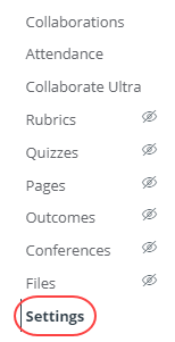
1. In Course Navigation, click the Settings link.
2. Click the Sections tab.

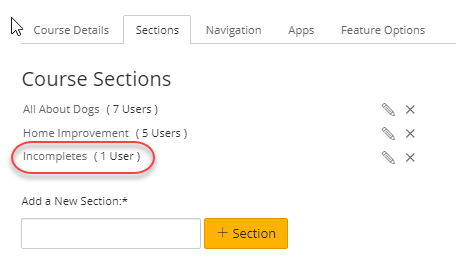
3. Click the name of the section.
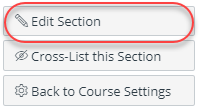
4. Click the Edit Section button located on the right-hand side.
5. Click the Starts calendar icon and select a new start date for the section.
6. Click the Ends calendar icon and select a new end date for the section.
Note: End dates occur at precisely the minute they are set. For example, a section with an end time at 11:59pm will end at 11:59:00.
Limit Student Participation
If you do not want to let students participate in the course section outside of the section dates, select the Students can only participate in the course between these dates checkbox.
Selecting this checkbox creates a section override and overrides the course dates. Students can only participate in the course section between the section dates, and the course section will be in a read-only state outside the course section dates.
This checkbox only affects student and observer roles; all other roles default to term access dates.
Notes:
- Section override dates are only created if the Student Participation checkbox is selected.
- If the Student Participation checkbox is not selected, students can participate in the course section before and after the start and end date, and participation will always be determined by the course dates. If a course does not include override dates, dates are determined by term dates.
- When the Student Participation checkbox is not selected, the section dates determine the placement of the course in the Past, Current, or Future Enrollments list for students.
7. Click the Update Section button.
You can change the name of a section by editing your course Settings in Canvas.
Note: Sections may be added by your institution's student information system (SIS). If a section in your course includes an SIS ID, you may not have permission to change the section name.
1. In Course Navigation, click the Settings link.
2. Click the Sections tab.

3. Locate the section and click the Edit icon.
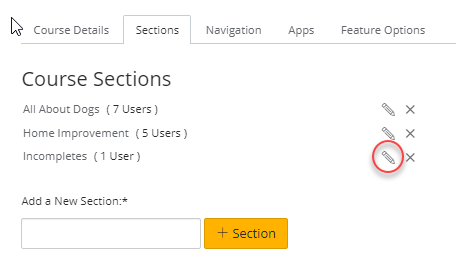
4. You can change the section name by typing in the text box and selecting Return (on a MAC keyboard ) or Enter (on a PC keyboard) to save your changes.
You can view the updated course sections in the same window.
You can delete a section by editing your course Settings in Canvas. You cannot delete a section with users enrolled.
Note: Sections may be added by your institution's student information system (SIS). If a section in your course includes an SIS ID, you may not have permission to delete sections.
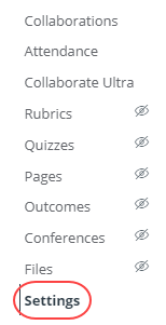
1. In Course Navigation, click the Settings link.
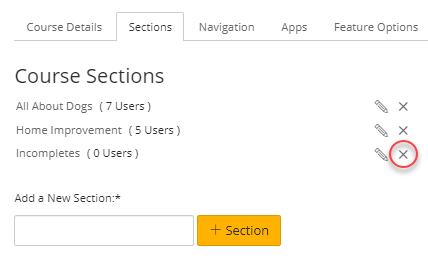
2. Click the Sections tab.

3. Locate the section and click the remove icon.
Note: You cannot delete a section that have users enrolled.
4. Click the OK button.
Add Course Section Enrollments
Once users have been added to your course, you may be able to edit their course section from the People page. This feature allows you to make modifications to course sections without having to delete the section enrollment.
If a user has not already accepted the course enrollment, editing the course section still requires the user to accept the course invitation. However, if a user has already accepted the initial course enrollment, editing a section does not require the user to accept a new course invitation.
If a user was added to multiple sections in the course with the same user role, adding a section or editing a current section retains the user role given with the course enrollment. However, if the user has multiple user roles, a section edit is associated with the last user role given to the user. Learn how to edit user roles.
Notes:
- Adding users to a section is a course permission. If you cannot add users to your course, your institution has restricted this feature.
- Sections may be added by your institution's student information system (SIS). If a user in your course includes an SIS ID, you may not have permission to edit sections.
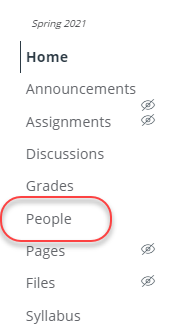
1. In Course Navigation, click the People link.
2. In the search field, search for the name of the user. You can also filter users by role in the Roles drop-down menu or you could simply scroll to find the name.
3. Click the user's Options icon [1], then select the Edit Sections link [2].

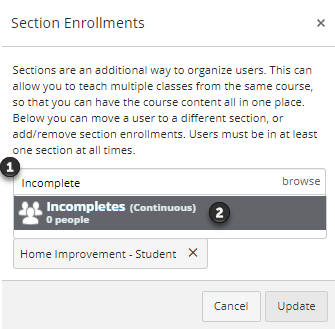
Canvas will show you the section(s) where the user is already enrolled.
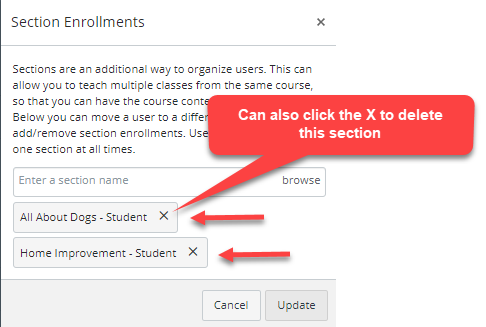
You can also choose to delete sections from here as well.
4. To add a section, begin typing the name of the section in the text field [1] and click the section when it appears [2].
Note: Users can be in more than one section. You do not need to remove the original section.
5. Click the Update button.
Remove Course Section Enrollments
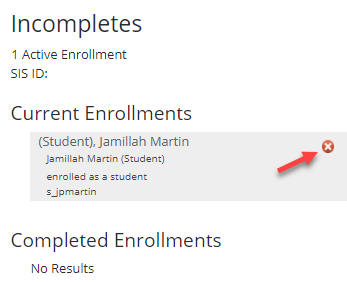
You may be able to remove section enrollments within your course Settings in Canvas. Removing an enrollment removes all associated coursework and grades from the course.
Section enrollments also include the Test Student, which is created when you enable Student View. If you need to remove the Test Student from the Gradebook, you can remove the Test Student from the enrolled section. Note that the Test Student may be part of more than one section.
Notes:
- Sections may be added by your institution's student information system (SIS). If a section in your course includes an SIS ID, you may not have permission to remove section enrollments.
- If you want to retain enrollment information for the user, you may be able to conclude the enrollment instead.
1. In Course Navigation, click the Settings link.

2. Click the Sections tab.

3. Click the name of the section.

4. Hover over the enrollment and click the Delete icon.
5. Click the OK button.
View Course Section Enrollments
You can view section enrollments within your course Settings in Canvas.
Section enrollments also include the Test Student, which is created when you enable Student View.
1. Click the name of the section.

2. View current and completed enrollments, if any, in the section. Students are listed in alphabetical order by last name.
