Add a Certificate of Completion
Custom Certificates for a Catalog Program
Certificates must be in HTML/CSS format and can be customized with some supported variables, such as:
Congratulations, {{student_name}}!
View an example CSS certificate file
To customize a certificate, you can use the following supported variables in your template:
- student_name: The name of the student
- catalog_name: The name of the school or institution
- catalog_logo: The URL of your catalog logo, usage:
<img src="{{catalog_logo}}" /> - award_name: The name of the certificate
- completion_date: The date of completion
Create a Custom Certificate
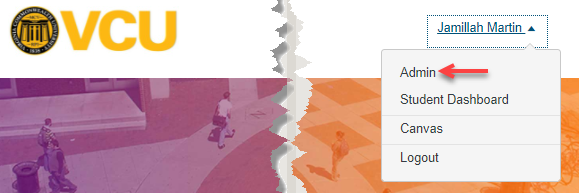
- In the User Menu, click the Admin link.
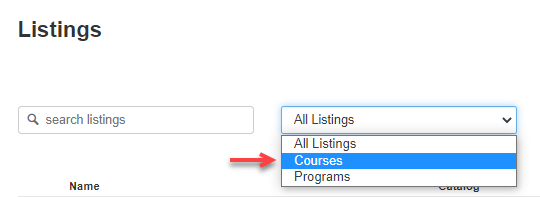
- In the Listings drop-down menu, click the Courses link.
- Click the name of the course listing.
- Click the Certificate tab [1].
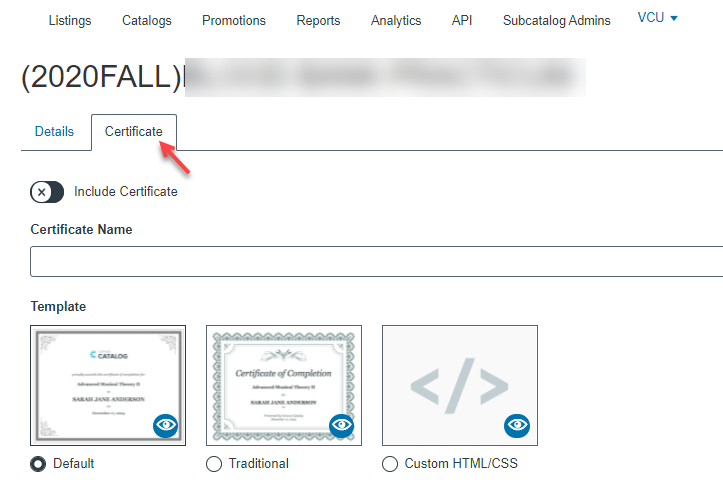
- Include the certificate in your course by toggling the Include Certificate button [2].
- Create a name for the certificate [3].
- Click the radio button for the template you want to use for your certificate. You can choose the default template, traditional template, or a custom HTML/CSS template [4].
- The default template includes the catalog logo, certificate name, student name, and date.
- The traditional template includes the certificate name, student name, account name, and date.
- The custom template requires custom HTML/CSS. Any coding you include here will be retained if you choose to switch to one of the pre-designed templates at a later time.
Add Custom Template
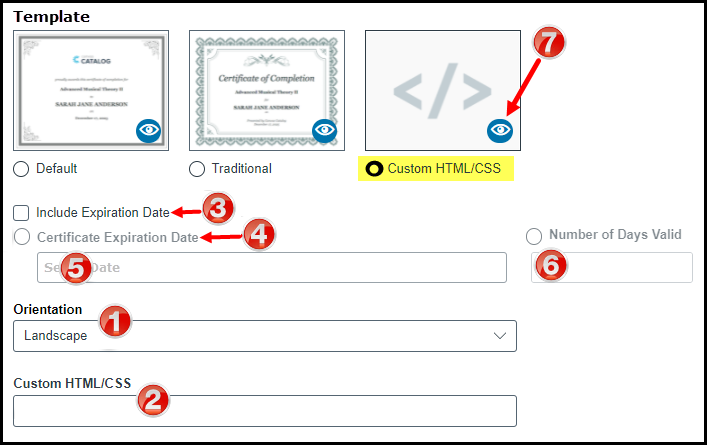
For custom templates, select the orientation for the template and add the custom code.
- In the orientation menu [1], select either landscape or portrait orientation.
- In the Custom HTML/CSS field [2], enter your template information in an HTML/CSS format. You can paste the code directly into the template field, or you can paste a URL to an external template file.
- To include a certificate expiration date, click the Include Expiration Date [3] checkbox.
- You can select a specific date on which the certificate expires or set a number of days for which the certificate is valid.
- To add a certificate expiration date, select the Certificate Expiration Date option [4]. Click the Select a date [5] field and choose a date from the calendar.
- To set the number of days for which the certificate is valid, select the Number of Days Valid option [6]. Type the number of days that you want the certificate to remain valid.
- View the certificate [7].
- Click the Save button when finished.
Note: Catalog will notify you if there are errors with your certificate. If there are any errors, correct them and click the Save button again.