Export Course Content
Canvas Course Exports can be used to:
- give to someone else using Canvas
- upload to another institution's account
- create a copy as a backup on your local computer
- import into another Canvas course that you are the instructor of
Export Files:
- are packaged as IMSCC ZIP files
- can only be opened by programs that support Common Cartridge files, unless you change the extension from .imscc to .zip, which will then treat it as any other .zip file.
Notes:
- Canvas exports do not include backups of student interactions and grades. Grades must be exported separately, as a comma separated values (CSV) file.
- Some external app LTI tools such as Google Drive do not retain tool configurations in exported courses.
- Canvas does not support course export files over 50 GB. Courses over 50 GB in size will not export and will display an error message. However, VCU Canvas courses have a size limit of 2 GB so if your course is larger than this, it is important that you size it down to 2GB or less.
Export Instructions
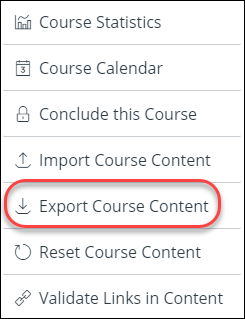
- In Course Navigation, click the Settings link.
- Click the Export Course Content link located on the right-hand side.
- In the Export Type heading, click the Course radio button.
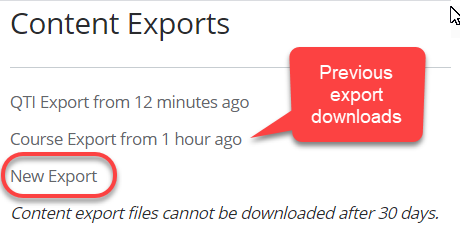
- Click Create Export. Note: If you have previously exported the course, Canvas will display prior exports under the "Content Exports" heading.
- View the progress bar - exporting a course in Canvas may take a few minutes, depending on its size. You will receive an email when the export is complete.
- When your download is ready, click the New Export link.
Note: Content exports expire after 30 days and can no longer be downloaded.
step 1: step 2:
step 5:
step 6: