How to Import Course Templates
- In the Canvas Global Navigation menu, click the Commons link.


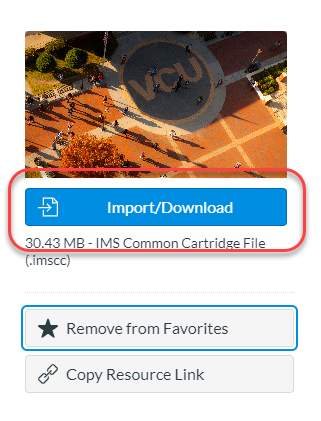
- Enter VCU into the search field [1] and click on the VCU Course Template link. [2]

- Optional: Click the click the Add to Favorites button to add this template to your Favorites menu.
- Click the Import/Download button.
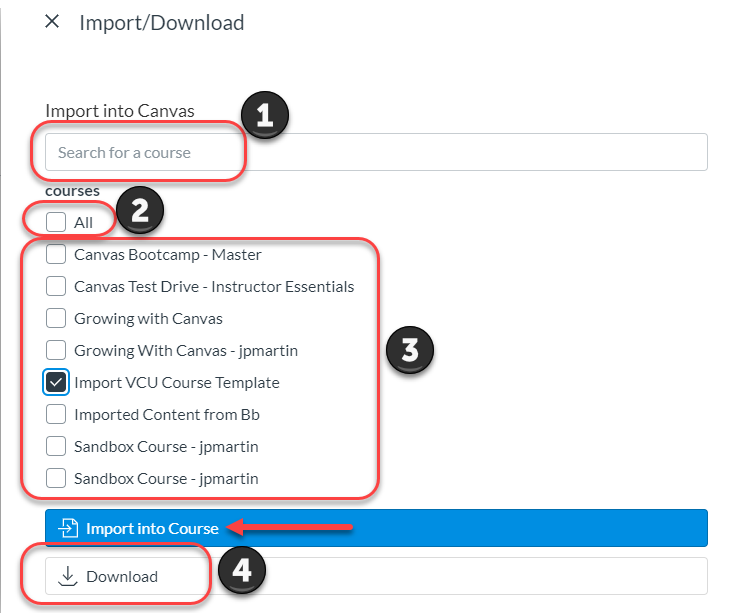
- Select from these options:
[1] search course titles
[2] check the All box to import into all of your courses
[3] check 1 or more specific courses to import into
Click the Import into Course option.
or
[4] download the template - The following should appear at the top of the screen:

If you decided to download the template, you should see the file download in the bottom left-hand corner. Download can be found wherever your computer is defaulted to download. This is usually the Downloads folder unless it has been otherwise changed.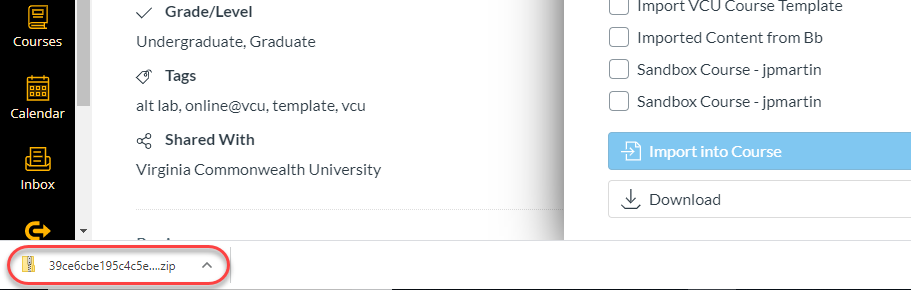
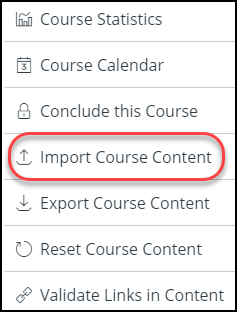
- If you decided to Download the template, navigate to the destination course (the one you want to
 import into ) and click Settings.
 - Click the Import Course Content button.
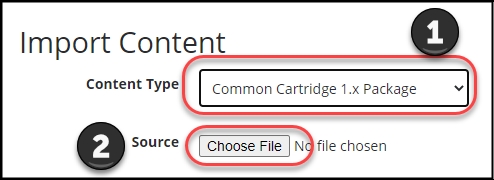
- From the Content Type dropdown list, select Commons Cartridge 1.x Package [1], and click the Choose File button to search for the downloaded file.
- In the Default Question Bank dropdown menu, select the Question Bank you want to use from Common Cartridge. If you do not have a question bank you want to use, you can create a new Question Bank by selecting the Create New Question Bank option in the dropdown menu.
- Select the import All Content or Select Specific Content. See below for more details on how to Select Specific Content.
- Options:
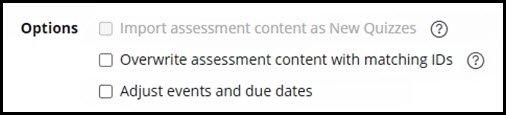
6a. To import assessment content created in New Quizzes, click the Import assessment content as New Quizzes option. Selecting this option which will convert assessments in the import package to New Quizzes format.
Note: You cannot select a default question bank when using the the "Import assessment content as New Quizzes" option.
6b. To overwrite the assessment content with matching IDs, click the Overwrite assessment content with match IDs checkbox.
Some systems recycle their IDs for each new export. Therefore, if you export two separate question banks they will have the same IDs. To prevent losing assessment data, Canvas treats the question banks as separate objects despite the IDs. Choosing this option will disable this safety feature and allow assessment data to overwrite existing data with the same IDs.
6c. If you want to adjust the due dates associated with the course events and assignments, click the adjust events and due dates checkbox.
7. Click Import.
Select Specific Content Additional Information
Note: If you select the "specific content" option, you are required to select the content you want to import after you review the remaining page options. After you start importing the content, the import selection cannot be canceled.
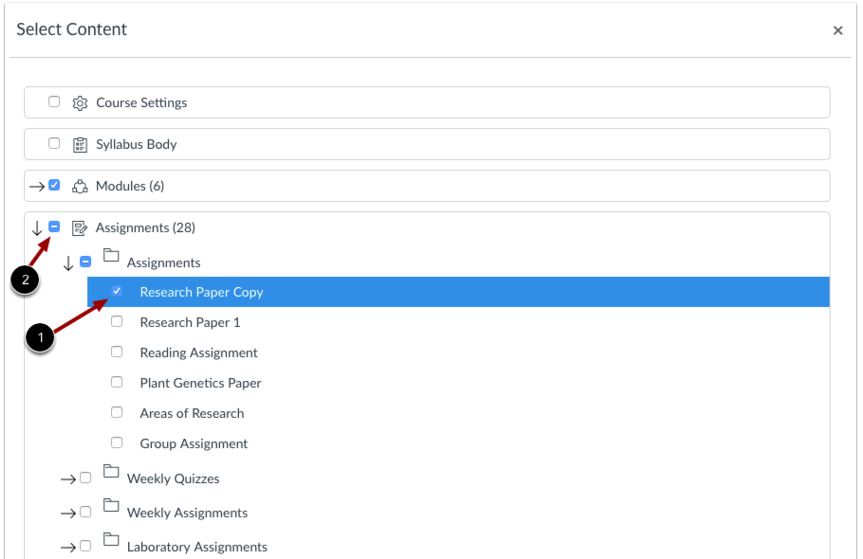
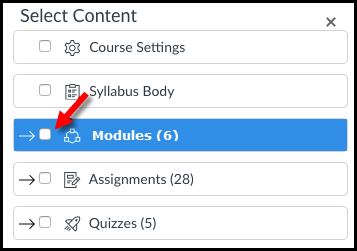
In the Current Jobs section, click the Select Content button.
Content can be individual items [1] or a content group [2]. Content groups show the number of items within the group. To view content within a group, click the group's expand icon [3].
To import all content for a content type, click the checkbox next to the content name [4]. If the content type is a group, Canvas automatically selects all items within the group.
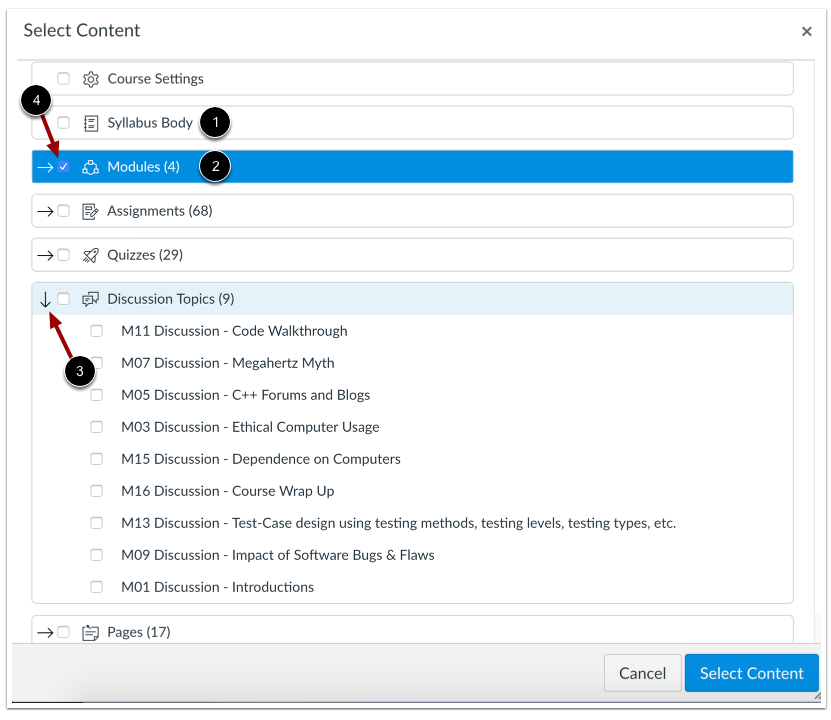
To import only a few items from a content group, expand the group and select the specific items to be imported [1]. Canvas places a dash in the content group checkbox [2], indicating not all items are selected within the group.
If you imported a Thin Common Cartridge file (Common Cartridge import), this file type is imported directly as module content. The structure can be expanded to view a nested layout that simulates the content structure. Learn how to select content with Thin Common Cartridge files.
Click Select Content.
The report displays a menu bar with the time remaining to complete the import. View the content from any completed imports by accessing any link in Course Navigation.
The import may also display errors as part of the import status. Learn more about course import statuses.